It’s hard to believe that it’s been more than two months since Lily was born. I started writing this blog post when she was only THREE WEEKS OLD. Yesterday she was eleven weeks old!
The days and weeks following Lily’s birth were a blur of highs and lows. At first it was really hard for me to come out of the fog long enough to gather my wits and write anything. I was really just trying to make it through the day. The past few weeks have been better, but my “free time” (a.k.a. the few minutes a day that Lily isn’t attached to my boob) is still very limited, and writing this blog post was pretty far down on my to do list. However, I did want to write it all down, before I forget.
And so, here is the story about the birth of my daughter, Lily Grace, who was born on March 9. I’m positive that it’s way too much information for some people who will read it…but what can I say? Childbirth is a very beautiful and gross thing.
My water broke at 5:30 am on March 8. It was the weirdest thing – I was sound asleep, then all of the sudden I was jolted awake. I woke up sputtering, as if I had been underwater. “That was odd,” I thought. “Well, I’m up, might as well go to the bathroom.” As soon as I stood up, I felt some moisture trickling down my leg.
You might think that would have been a clear indicator that my water broke, but I wasn’t sure. Dave and I had had sex the night before, and one of the weird and gross things that happened during my pregnancy was that I couldn’t quite “empty out” when I went to the bathroom after sex. The result? Liquid trickling down my legs when I got out of bed the next morning.
After I peed, I sat on the toilet for a minute or two. Liquid continued to trickle out. “Okay, this is different,” I thought. I wiped and looked at the toilet paper, and it was clear, and I gave it a quick sniff. No smell.
I went back into the bedroom. Dave had to work that day, and his alarm had just gone off. “I think my water broke. But I’m not sure,” I told him. We decided that he would go to work and we would see what happened over the next few hours. I had a mini panic attack as he was leaving. “Don’t go! I don’t know what to do! What if something happens?!” But he talked me off the ledge. He would only be a few blocks away, and it’s not like I was having contractions. We still weren’t positive that my water had broken in the first place!
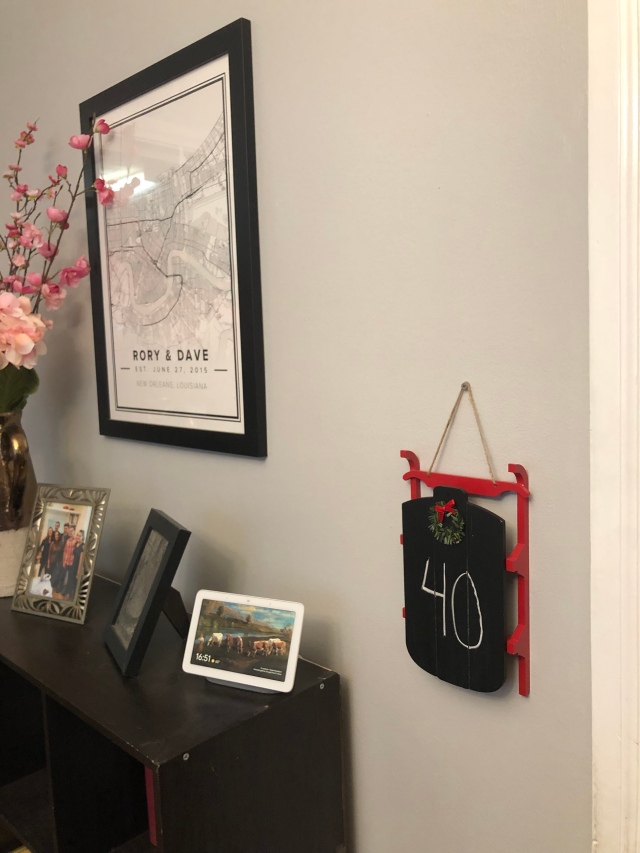
Now, let me pause to say that I did NOT want my water to have broken. Things at work had just gotten really busy, and I was looking forward to clocking as many hours as possible before my due date, which was March 16. Going into labor would really throw a wrench in my plans. Also, I had JUST bought one of those belly casts! And I still hadn’t taken any of those pretty bump pictures!
But obviously it didn’t matter what I wanted. Although I was hopeful that it hadn’t (only 15% of women actually have their water break before labor, so I had pretty good odds), deep down I was pretty sure my water HAD broken, and I needed to proceed as such. So I packed my hospital bag, had a bowl of cereal, washed the dishes, did laundry, tidied up the house, and then sat down to wrap up all the stuff I’d been doing for work. It was a very busy morning, now that I think about it.
After several trips to the bathroom, I was convinced that my water had definitely broken, because there was still liquid coming out. I also thought I might be having contractions, because I was feeling these waves of mild discomfort that were like really light period cramps, which is what I read that contractions felt like. But they were really sporadic – there’d be like a 20 minute gap, then an hour gap, etc.
At around 10:30 I FINALLY decided to call my doctor. His nurse gave me a 1 pm appointment. Which was perfect – that gave me time to finish up my work, write a blog post, take a shower, flat iron my hair, and put on some makeup – you know, all the important things.
I texted Dave and told him I was going to the doctor at 1. He asked if I wanted him to meet me there, but I said no, we could wait and see what the doctor said. I also texted my two friends to let them know what was going on, since they would be keeping me company at the hospital.
When I got to the doctor I told him that I thought my water had broken but wasn’t sure. I was up on the exam table, and the second I spread my legs he laughed and said, “Oh yeah, your water totally broke. No question. Are you ready for a March 8th baby?!” I still can’t figure out how he knew so fast – maybe I had leaked on the paper on his exam table?

One of the last shots of my baby bump, taken right before my doctor came in to examine me.
After giving me a quick pelvic exam and determining that I was less than 2 centimeters dilated, my doctor (who is located in the hospital I delivered at) told his nurse call over to labor and delivery and tell them I would be getting there in a few minutes. Even though I was hardly dilated, the fact that my water had broken over 8 hours earlier meant that I needed to be admitted. It would be bad for the baby if too much time passed without any amniotic fluid in there.
“Okay. Can I eat something? I’m starving.” I asked him. When my doctor, who had been ridiculously easygoing about everything my entire pregnancy, actually told me “No,” I couldn’t eat anything because my stomach needed to be empty in case I needed a c section – well, that’s when shit suddenly got real.
Over the course of my pregnancy, my doctor had said “yes” to everything I had ever asked him. Can I eat lox? Sure, no problem. Can I fly to NY at 8 months? Yeah, just make sure to get up and walk around on the flight. Etc. So for him to actually tell me “no” to something was kind of a reality check – like, this thing is actually happening! I’m really about to have a baby! Holy crap! I’m not ready!
But of course there was nothing I could do (although I did sneak a granola bar when no one was around. #badass). His nurse ordered up a wheelchair for me, and a few minutes later she wheeled me over to labor and delivery. I updated Dave and my friends to let them know they could head on over.
The first really painful thing that happened that day was when one of the L&D nurses tried to put in my IV. She had gone on and on about how big and awesome my veins were, but when she stuck the needle in my left hand it didn’t work, so she had to take it out and put it in my right hand. A big knot swelled up on my left hand where she had stuck me, and for the rest of the day, every time the blood pressure machine squeezed around my left arm, I felt like I was being stabbed in the hand where she had stuck me with that needle.
And in case you’re wondering, that happened about 100 times over the course of the day. It was the worst! Fortunately, another nurse took over and was able to successfully put the IV in my right hand.
Then she gave me Pitocen to induce labor (puh-TOE-sin, not PIE-toe-kin as I’d been saying in my head for months). At that point my contractions were still weak and spread out, and because we were now going on over 10 hours since my water had broken, we needed to get them going.
My friend Ximena arrived while that was happening, and Dave followed soon after with my hospital bag. My other friend Rowan arrived about a half hour later, and for the next hour or two it was just general silliness among the four of us and the L&D nurses.
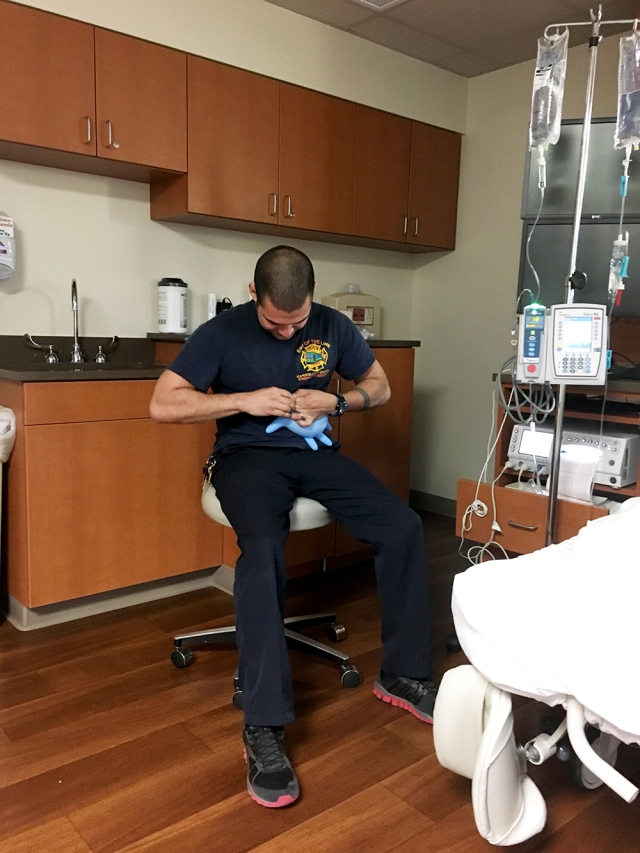
Dave trying his hardest to keep himself entertained. 🙂
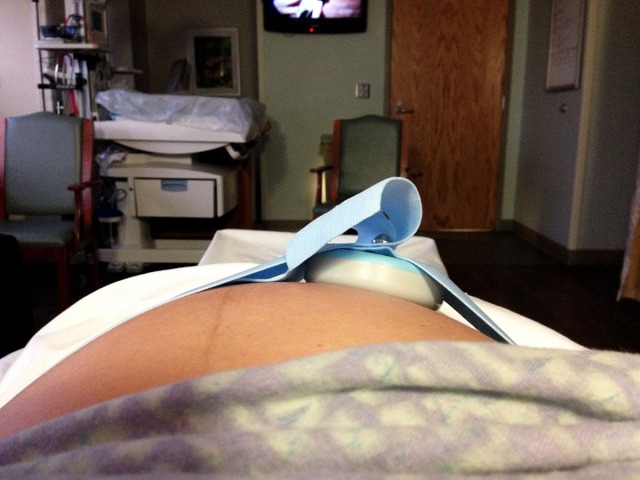
This little thing provided us with soooo many laughs. It was monitoring the baby’s heart rate, so the entire time I was there, I was hearing the baby’s heartbeat, which was awesome! But whenever I laughed, the monitor would amplify that sound as well. It sounded like a DJ scratching a record. I kept getting fits of giggles, which would set off the monitor, which would make me laugh harder, which made everyone else crack up!
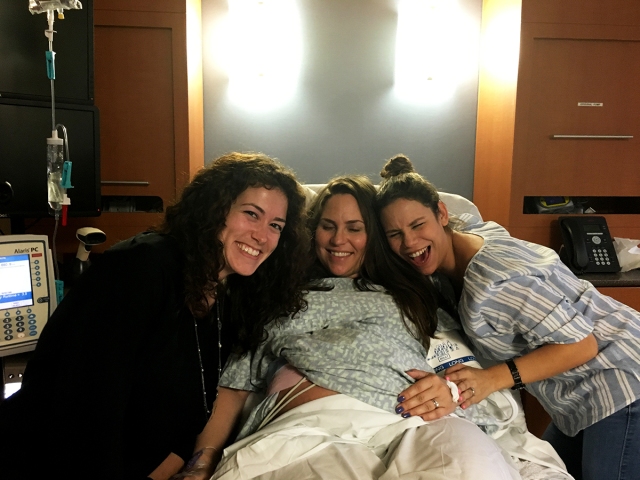
I wish I could remember what we were laughing at – looks like it was pretty funny!

Awww ❤
So yeah, all was going well for a little while. Until the Pitocen kicked in. Then things really got real.
I didn’t know it at the time, but apparently Pitocen contractions are like 1,000 times worse than regular labor contractions. Over the next hour or so, my contractions went from “weak and spread out” to “strong and constant.” And painful. Oh so painful.
Right after I was given the Pitocen, a male nurse had come in to see if I wanted an epidural. I’d always planned on getting one. “Don’t be a hero – get the epidural!” my friend told me. “Would you go to the dentist without Novocaine?” asked my mother in law. But I was a little scared of the needle and the possible side effects. And my mom had told me that when she got an epidural with my brother, it caused her labor to last longer. So with all those things in mind, I signed the necessary forms but told him that I wanted to wait until I was a bit more dilated. At that point it was around 3 pm, and I was only 3 cm dilated.
That proved to be the wrong decision. When my nurse came back in at 5 pm to check on me, my contractions were like five minutes apart and getting more and more painful, but I was still only 3 cm dilated! I suddenly realized that I might be having these contractions for the next 8 hours!
F*ck that! I immediately told her I wanted the epidural. She told me she would notify the male nurse, since he’s the one who would be doing it.
Then I told her that I needed to pee. When she told me I would need to use a bedpan because she couldn’t unhook me from the machines that were monitoring the baby’s reaction to the Pitocen, I started to freak out. And when she followed that up by saying that once the epidural kicked in, she would have to insert a catheter, I had a full-on melt down. I started crying and told Rowan and Ximena to get out. They scurried out, and then Dave and the nurse tried to calm me down while I was bawling.
Having to use a bedpan was bad enough. (My bathroom was only 20 feet away! Why hadn’t she told me about the bedpan before she gave me the Pitocen?) But her sticking a catheter in me? Forget it. I felt like it was going to be painful, and visualizing it had sent me over the ledge. “I don’t want a catheter!” I cried. But they managed to calm me down. The nurse reminded me that I would be numb from the epidural and I wouldn’t even feel it. Dave just kept saying that it would be okay.
Finally I got myself together. I peed in the bedpan, and then the male nurse and another female nurse came to do the epidural.
Yes, the epidural hurt. Not a ton, but there was a significant amount of pain while it was happening – aside from the needle, they had to take my blood pressure every two minutes while they were doing it and for the half hour after, which meant every two minutes I was feeling that stabbing pain because of the messed up IV attempt. PLUS I was still having contractions, and I had to stay completely still so they could do the epidural. It was a rough hour.
But with that said, all of that hurt wayyyy less than the last few contractions I’d had! And once the epidural kicked in? Well, not to brag, but from then on my labor was pretty much smooth sailing! There was hardly any more pain after that, and whenever I felt the epidural wearing off and the contractions getting a little stronger, I just hit a little button and gave myself a dose of…whatever it is, and boom, the pain was gone.
If anyone asks me, I will always recommend an epidural.
Dave’s parents came at some point, I can’t really remember when. It might have been before the epidural, because I remember Dave’s father offering everyone cookies, and I barked out, “No, there’s no eating in here! If I can’t eat, no one can!” That was my only diva moment lol.
Anyway, the epidural kicked in around 6:30 pm, and from then on we were just playing the waiting game. Over the next few hours we did origami, watched tv, played games, and I even took a nap. We took guesses on what time the baby would come, and how much it would weigh (I said 11:28 pm, and 8 pounds 10 ounces).
The nurses came in every so often to check how dilated I was. I was 4 cm dilated when they gave me the epidural. At 7:30 pm, I was almost 6 cm. So when they checked again at 8 pm and I was 9.5 cm dilated, I was shocked! It was such a huge jump! Holy sh*t, this baby is coming now!
Or so I thought. But it was a very busy night in the labor and delivery ward. They checked on me at around 9:30 pm, and then I didn’t see any nurses again until after midnight! There was this one Indian guy who was a medical student, who had asked me early in the afternoon if I would be okay with him watching the delivery. Sure, no problem. He kept coming in every so often to check on me, and when he came in at 11 pm I asked him if he could get one of the nurses to come see how dilated I was. I didn’t want to bother them directly, but I felt like I must be ready to go.
Finally at 12:30 am, the nurse came back. She took a quick look and said “Oh, it’s time. Are you ready to have this baby?!” If I hadn’t been so nervous, I probably would have said “Yeah, I was ready two hours ago!” At around 12:45, a team of people swarmed in with equipment, and Dave’s parents and my friends went to the waiting room.
And then it began. There were four nurses at the foot of my bed, and the Indian med student was right next to them. My doctor was about five feet away, “observing” (I was surprised by how much the nurses did and how little the doctor did), and there were some other people in the background. The nurses raised my bed so it was inclined, and told me that when my next contraction started, I needed to start pushing. So I did.
It was such a surreal experience. I was doing something I had seen on tv a thousand times, and I felt I was watching the scene on tv while living it at the same time. When I would start pushing, the nurses and med student would start cheering me on wildly: “Push push push push push, yeah, you’re doing great, keep pushing, push, push!!!!” All five of them at once. When the contractions stopped and I would stop pushing, they’d be like “Yeah! that was great! Just a few more times!” It was endearing and bizarre at the same time. The pushing itself was kind of difficult, mainly because I couldn’t feel anything below the waist.
That went on for about 10 minutes. Then the nurses said that they could see the baby, but it was stuck under my pelvic bone. So they got the vacuum and stuck the suction cup on the baby’s head. Then they told me to push again. I bore down with everything I had and pushed, and Dave held my hand and started cheering me on along with everyone else. A minute or so later, the baby’s head popped out. It took one more push to get the body out, and then, at 1 am, it was over.
“It’s a girl!” the nurse said.
“What? Are you sure?!” I asked frantically. I had convinced myself that I was having a boy.
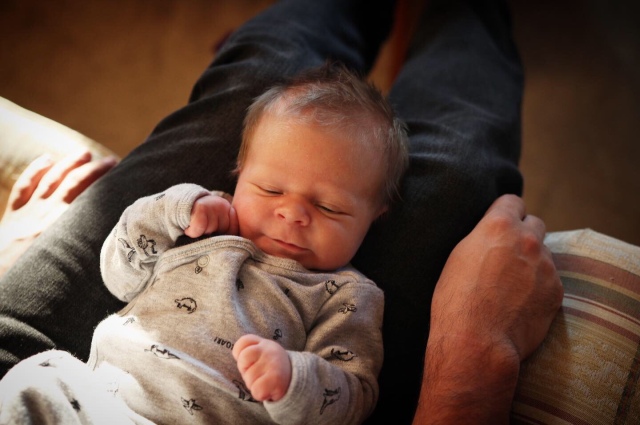
They all laughed. Dave and I started crying. They clamped the cord and Dave cut it. Then they cleaned her up a little and laid her on my chest. I’m so happy that Dave took a picture of what ended up being my first look at our daughter.

Welcome to the world, Lily!
And a minute later:

Lily laying on my stomach. I had to crop my boob out of these pics!
I’m happy to report that when I looked at Lily, I fell completely in love with her. I was worried that I might not feel the connection, but that was definitely not the case.
About 10 minutes after she was born, Dave went out to tell everyone that it was a girl. According to Ximena, everyone started crying and hugging. I swear, not finding out the gender was one of the best experiences ever! At around 1:30 am, I let them come in to see her.
So there it is. Lily’s birth story. All in all it was a pretty good experience. Not TOO much pain, and only 15 minutes of pushing. My recovery? Well, that’s another story, soon to be told. 🙂